介绍
Axum+SeaOrm+Async-graphql 从0到1快速搭建Graphql服务
# Axum+SeaOrm+Async-graphql 从0到1快速搭建Graphql服务
本文以一个学习者的角度,一步一步带大家快速搭建一个Graphql服务。
首先得了解一下Axum、SeaOrm、Async-graphql分别是什么
# Axum
Axum (opens new window) 是一个用于构建 Web 应用程序的高性能、异步、模块化框架,它基于 Rust 语言,并且依赖于 Tokio 异步运行时来处理并发和 I/O。Axum 主要特点包括:
- 人体工程学与模块化:
- 设计注重开发者体验,提供易于使用的 API 来组织应用程序结构。
- 支持将应用逻辑分解为可重用的模块,有助于构建大型、复杂的服务。
- 无宏路由:
- 提供了一种不依赖宏的机制来定义和匹配 HTTP 路由,允许您清晰地声明如何将请求分派到相应的处理程序。
- 提取器(Extractors):
- 提供了声明式的方式来从请求中提取数据,比如查询参数、路径参数、表单数据等。
- 中间件支持:
- 可以编写自定义中间件,通过
axum::middleware模块提供的原生方法或者组合现有的中间件来进行身份验证、日志记录、错误处理等。
- 可以编写自定义中间件,通过
- 异步服务:
- 基于 Rust 异步编程模型,Axum 可以高效地利用系统资源,实现非阻塞 I/O 和高并发性能。
- 功能丰富:
- 支持处理多种 HTTP 功能,如 GET、POST 请求,文件上传,WebSocket 连接,以及静态资源服务等。
Axum 没有一个比较好的文档,我在学习的时候主要是参考axum - Rust (docs.rs) (opens new window)库文档。
# SeaORM
SeaORM (opens new window) 是一个用 Rust 语言编写的对象关系映射(Object-Relational Mapping,简称 ORM)框架。它旨在简化与 SQL 数据库的交互,允许开发者通过定义结构化的 Rust 类型来表示数据库表,并提供了一套方便、类型安全且直观的方式来执行 CRUD(创建、读取、更新和删除)操作。
SeaORM 的主要特点包括:
- 多数据库支持: SeaORM 支持多种 SQL 数据库,如 SQLite、PostgreSQL、MySQL 等,允许开发人员在不改变代码的情况下轻松切换数据库后端。
- 实体定义:
开发者可以定义
Entity结构体,通过注解关联到数据库中的表,并自动映射列到结构体的字段。 - 查询构建器: 提供了灵活且强大的查询构建 API,使得编写复杂的 SQL 查询变得简单且类型安全。
- 活跃记录模式: SeaORM 遵循 ActiveRecord 模式,这意味着实体可以像对象一样直接操作数据库,例如保存、更新和删除记录。
- 异步支持: 对于需要高性能的应用场景,SeaORM 可以与异步运行时和数据库驱动(如 SQLx)集成,实现异步 I/O 操作。
- 类型安全: 它强调 Rust 的类型系统优势,确保在编译时就能捕获许多潜在的数据库访问错误。
- 迁移工具: SeaORM 还包含了数据库迁移工具,帮助开发者管理数据库 schema 的版本控制和变更。
- 模块化设计: 具有高度的模块化和可扩展性,可以根据项目需求选择使用部分功能。
SeaORM 官方教程 --- Introduction - SeaORM Tutorials (sea-ql.org) (opens new window)
# Async-graphql
Async-graphql是一个用于 Rust 语言的异步 GraphQL 服务器库,它允许开发者构建高性能且符合 GraphQL 规范的 API。Async-graphql 提供了完整的 GraphQL 服务实现,包括 schema 定义、解析器、执行器和订阅功能,并且与 Rust 的异步编程模型深度集成。
Async-graphql 的主要特点包括:
异步支持:完全基于 Rust 异步编程模型设计,能够充分利用 Rust 的 async/await 关键字和 Futures,确保在处理高并发请求时能够高效利用系统资源,避免阻塞和减少上下文切换开销。
类型安全:通过强大的 Rust 类型系统保证 GraphQL API 的安全性,允许开发者定义 GraphQL 类型并在编译时捕获错误。
零成本抽象:遵循 Rust 语言的核心原则,Async-graphql 在保证易用性的同时尽量减少运行时的额外开销。
灵活的 Schema 定义:提供直观的方式来定义 GraphQL schema,可以轻松映射到 Rust 中的数据结构(如 enums, structs),并自动为它们生成 GraphQL 相应的类型。
集成便利:可与多种 Rust 生态中的数据库 ORM(如 Diesel)、HTTP 服务器框架(如 Actix-web)等无缝集成,方便构建全栈 Rust 应用。
性能优化:由于 Rust 语言本身的特点以及库的设计,Async-graphql 能够以较低的内存占用和较高的吞吐量运行 GraphQL 查询。
Async-graphql官方教程 (opens new window)
上面只是简单复制粘贴了一些概念,下面才是本文的重头戏,相信你已经迫不及待的想要开始实践了吧。
# 快速入门
# 1.集成Graphql
Shuttle 是一个云服务平台,它允许用户免费访问和利用服务器及数据库资源,旨在为初学者提供便利条件,让他们无需额外投资即可迅速展开学习实践。
用GitHub登陆可以免费白嫖三个项目
安装shuttle
cargo install cargo-shuttle
初始化
cargo shuttle init
然后选择Axum框架
安装依赖
cargo add async-graphql async-graphql-axum
然后修改main.rs
use async_graphql::{http::GraphiQLSource, *};
use async_graphql_axum::GraphQL;
use axum::{
    response::{Html, IntoResponse},
    routing::get,
    Router,
};

// 定义枚举
#[derive(Debug, Enum, PartialEq, Eq, Clone, Copy)]
enum Role {
    Admin,
    User,
}

impl Default for Role {
    fn default() -> Self {
        Self::User
    }
}

// 定义复杂对象
#[derive(Debug, SimpleObject, Default)]
#[graphql(complex)]
struct User {
    role: Role,
    username: String,
    email: String,
    address: String,
    age: i32,
}

#[ComplexObject]
impl User {
    async fn users(&self) -> String {
        format!("{:?}", self)
    }
}

// 定义查询对象
struct Query;

// 实现查询对象的方法
#[Object]
impl Query {
    // 异步返回字符串
    async fn hello(&self) -> String {
        "Hello, world!".to_string()
    }

    // 异步返回两个整数相加的结果
    async fn add(&self, a: i32, b: i32) -> i32 {
        a + b
    }

    async fn user(
        &self,
        #[graphql(desc = "Username of the user")] username: String,
        #[graphql(desc = "User age")] age: i32,
    ) -> User {
        User {
            username,
            email: "test@example.com".to_string(),
            address: "123 Main St".to_string(),
            age,
            role: Role::User,
        }
    }
}

// 异步返回GraphiQL页面
async fn graphql() -> impl IntoResponse {
    Html(GraphiQLSource::build().endpoint("/graphql").finish())
}

// 异步返回静态字符串
async fn hello_world() -> &'static str {
    "Hello, world!"
}

// 主函数
#[shuttle_runtime::main]
async fn main() -> shuttle_axum::ShuttleAxum {
    // 构建GraphQL Schema
    let schema = Schema::build(Query, EmptyMutation, EmptySubscription)
        // .extension(ApolloTracing)
        .finish();
    // 构建路由
    let router = Router::new()
        .route("/", get(hello_world))
        .route("/graphql", get(graphql).post_service(GraphQL::new(schema)));

    // 将路由转换为Axum响应
    Ok(router.into())
}
然后运行
cargo shuttle run

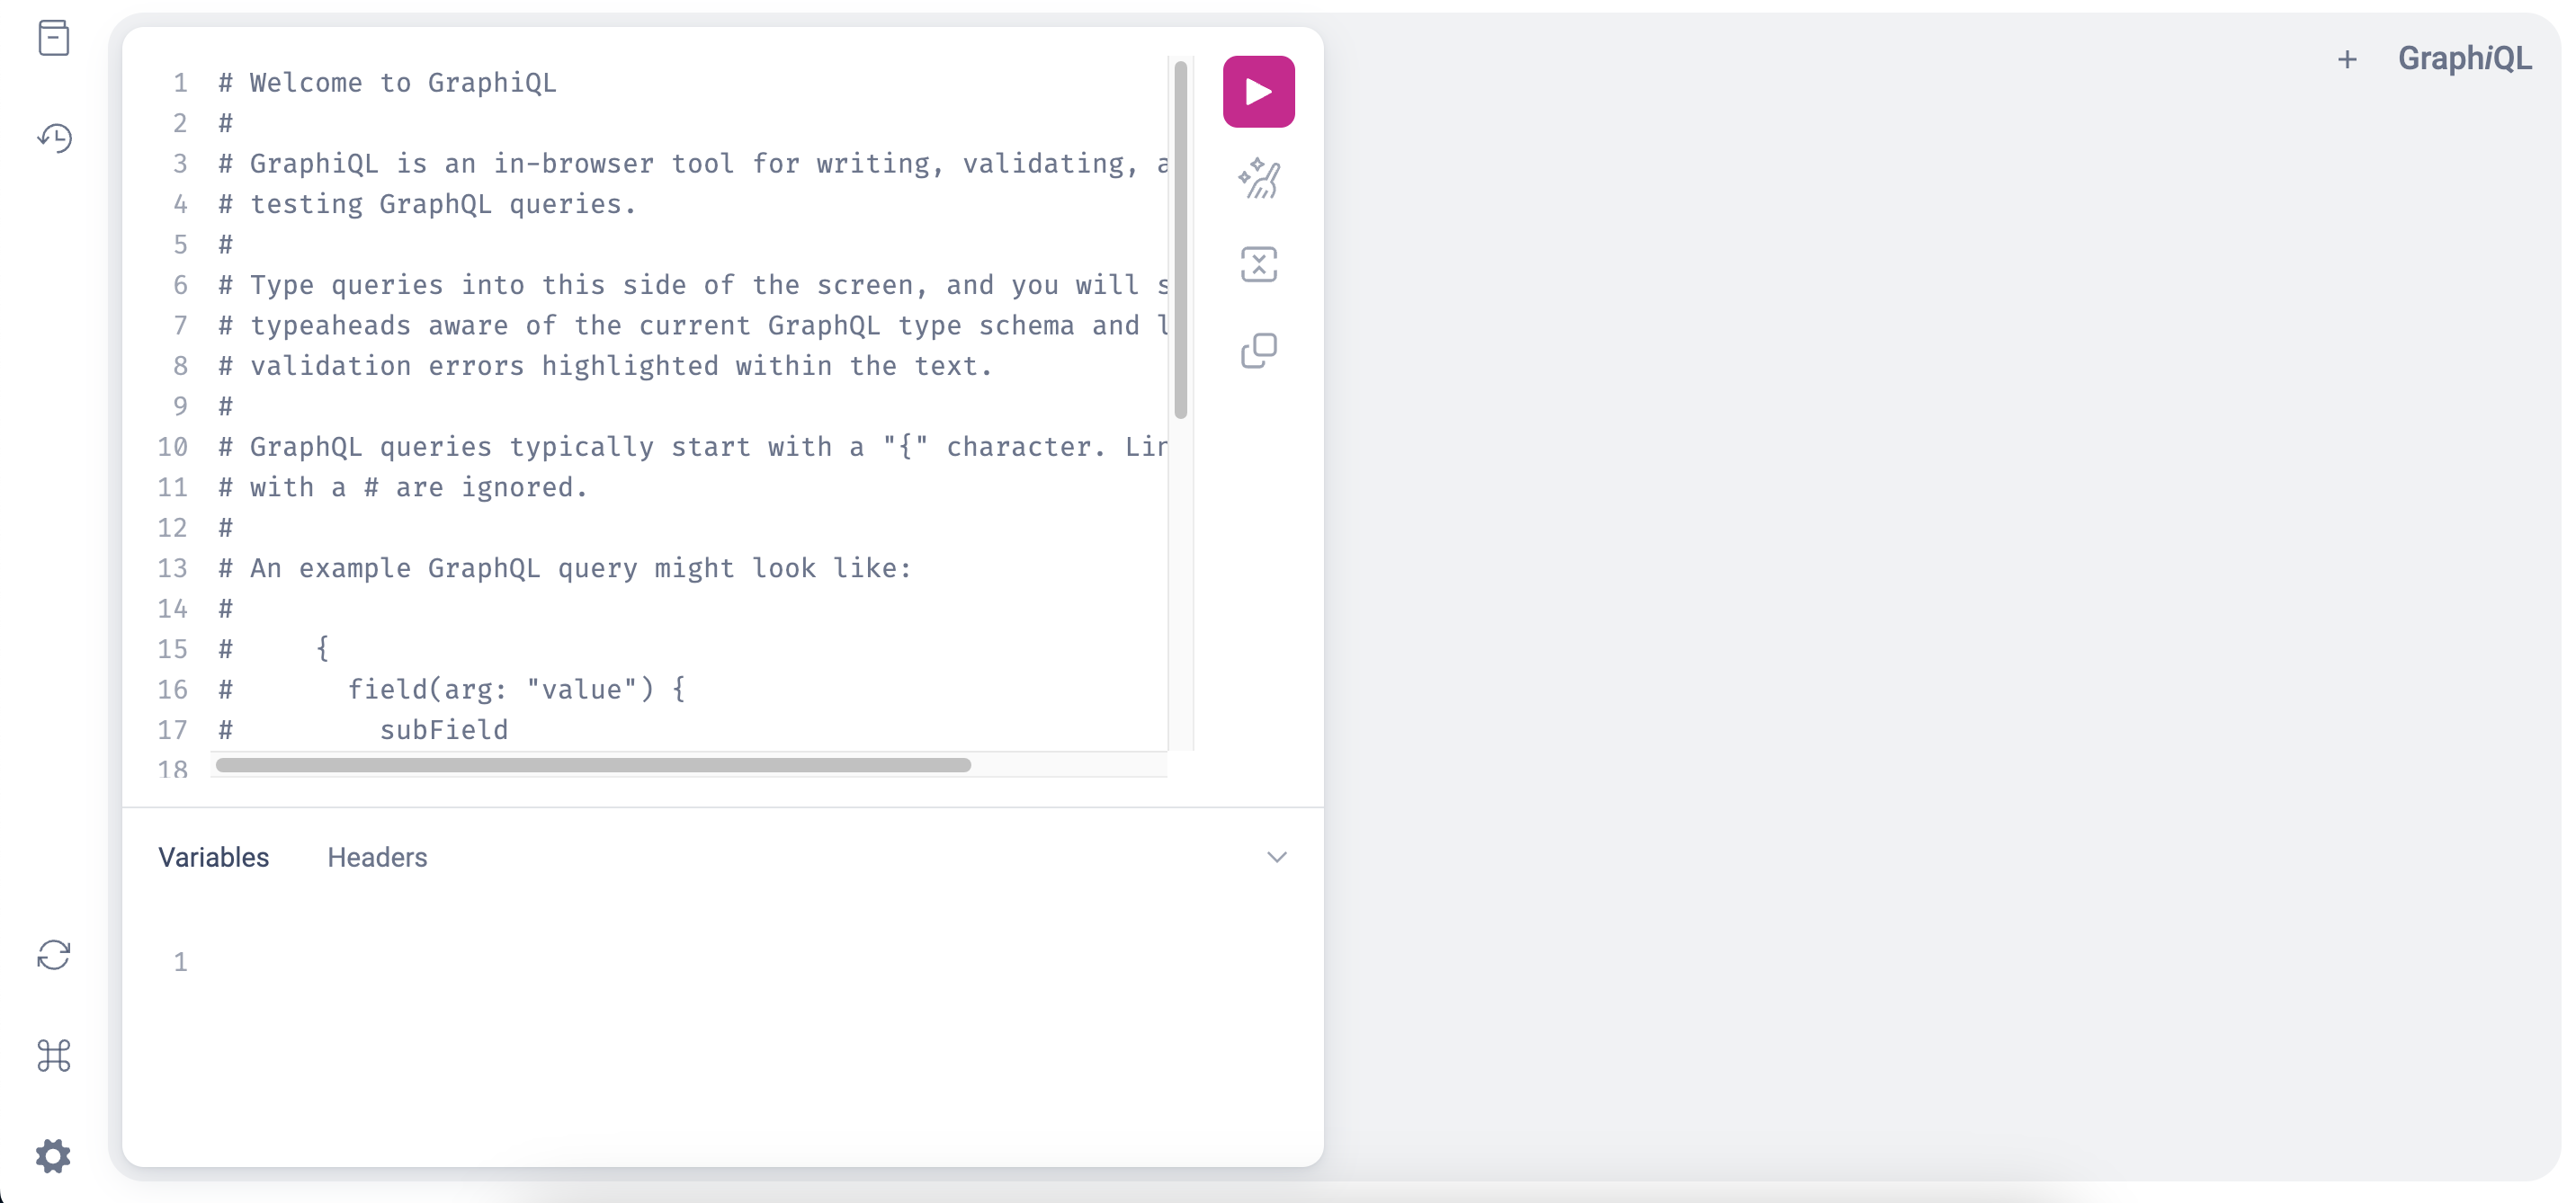
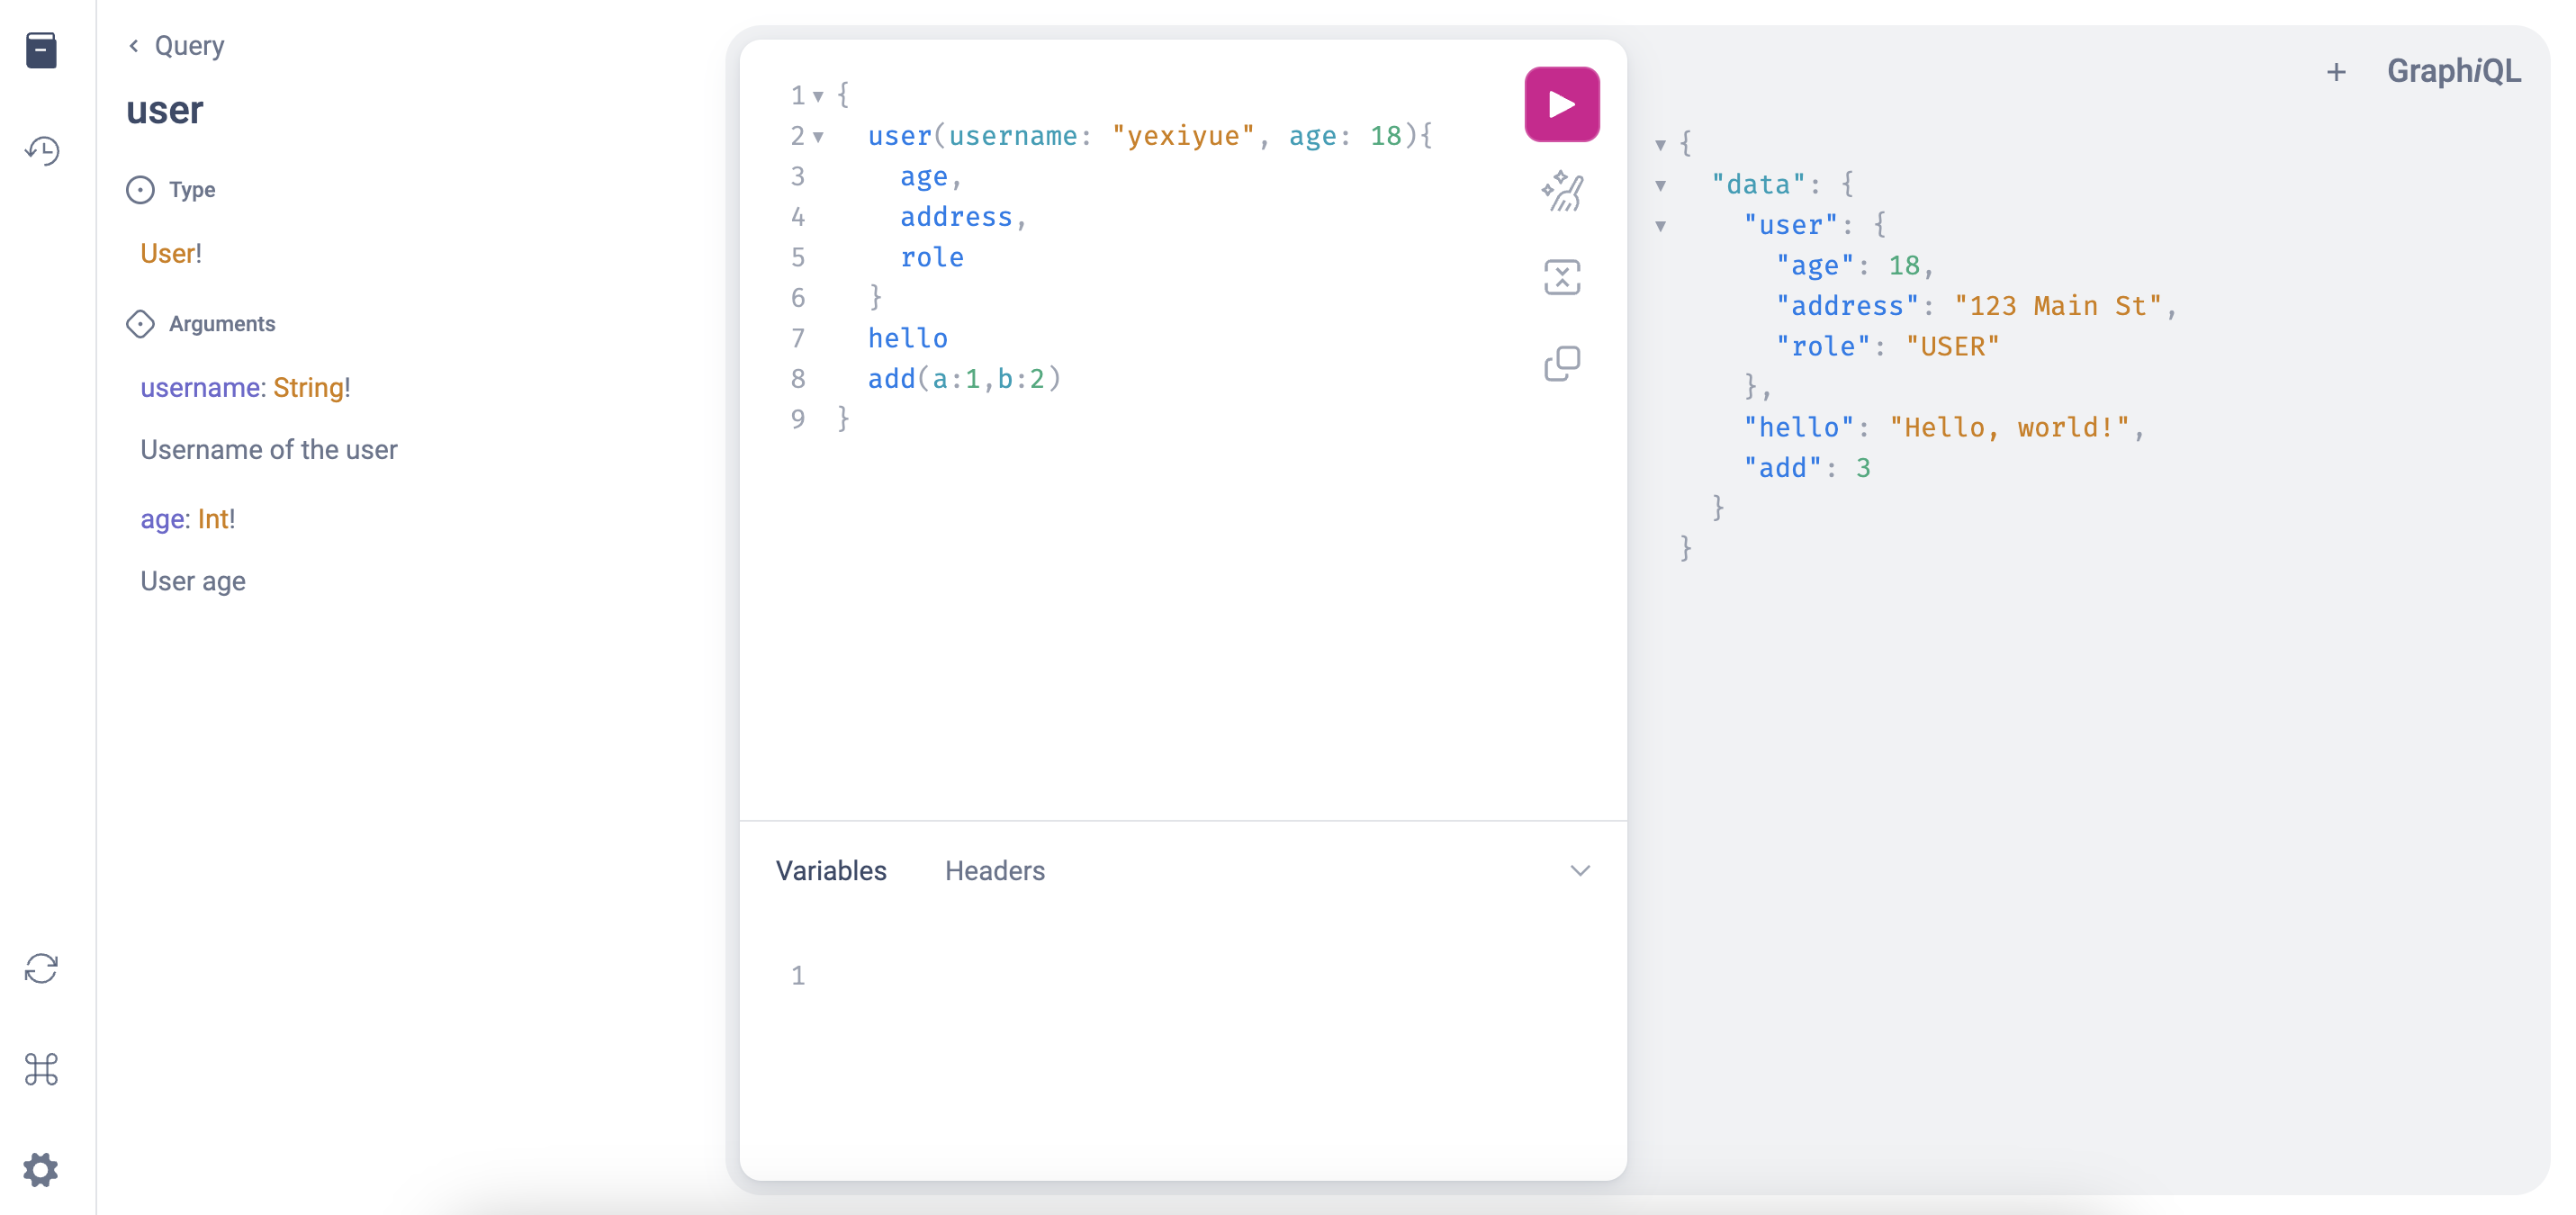
在浏览器中输入http://127.0.0.1:8000/graphql就能进入graphql的playground了


# 2.定义库表
设置迁移 (opens new window) 如果从新数据库开始,最好对数据库架构进行版本控制。SeaORM 附带了一个迁移工具,允许您使用 SeaQuery 或 SQL 编写迁移,意思就是先编写迁移代码,然后再生成实体,具体的内容可以查看上面文档。
安装sea-or-cli
cargo install sea-orm-cli
然后初始化迁移
sea-orm-cli migrate init
然后将改包添加进workspace
修改项目根路径下的Cargo.toml
[dependencies]
// add
entries = { path = "./entries" }
// add
[workspace]
members = ["migration"]
然后编写迁移文件
// 引入sea_orm_migration库中的预设项
use sea_orm_migration::prelude::*;

// 使用DeriveMigrationName特性自动生成迁移名称
#[derive(DeriveMigrationName)]
pub struct Migration;

// 实现MigrationTrait trait,其中定义了数据库表结构的创建和删除操作
#[async_trait::async_trait]
impl MigrationTrait for Migration {
    // `up`方法用于执行数据库表结构的升级操作,即创建新表或修改表结构
    async fn up(&self, manager: &SchemaManager) -> Result<(), DbErr> {
        // 创建User表
        manager.create_table(
            Table::create()
                .table(User::Table)
                // 如果表不存在则创建
                .if_not_exists()
                // 定义主键ID列,为整数类型,不可为空,并自动递增
                .col(ColumnDef::new(User::Id).integer().not_null().auto_increment().primary_key())
                // 用户名列,字符串类型且不能为空
                .col(ColumnDef::new(User::Username).string().not_null())
                // 电子邮件列,字符串类型且不能为空
                .col(ColumnDef::new(User::Email).string().not_null())
                // 地址列,字符串类型且不能为空
                .col(ColumnDef::new(User::Address).string().not_null())
                // 年龄列,整数类型且不能为空
                .col(ColumnDef::new(User::Age).integer().not_null())
                // 将上述定义转换为可拥有所有权的Table对象
                .to_owned(),
        )
        .await?;

        // 创建Actions表
        manager.create_table(
            Table::create()
                .table(Actions::Table)
                .if_not_exists()
                // 定义主键ID列,以及其他列属性与User表类似
                .col(ColumnDef::new(Actions::Id).integer().not_null().auto_increment().primary_key())
                .col(ColumnDef::new(Actions::Title).string().not_null())
                .col(ColumnDef::new(Actions::Description).string().not_null())
                .col(ColumnDef::new(Actions::CreateTime).timestamp().default(Expr::current_timestamp()))
                .col(ColumnDef::new(Actions::UpdateTime).timestamp().default(Expr::current_timestamp()))
                .col(ColumnDef::new(Actions::AuthorId).integer().not_null())
                .col(ColumnDef::new(Actions::UsedTimes).integer().default(0))
                // 添加外键约束,将Actions表的AuthorId列关联到User表的Id列
                .foreign_key(
                    ForeignKey::create()
                        .from_tbl(Actions::Table)
                        .from_col(Actions::AuthorId)
                        .to(User::Table, User::Id),
                )
                .to_owned(),
        )
        .await?;

        // 创建Comment表并设置外键约束,关联到User表和Actions表
        manager.create_table(
            Table::create()
                .table(Comment::Table)
                .if_not_exists()
                // 同样定义列属性以及与User表和Actions表的外键关联
                .col(ColumnDef::new(Comment::Id).integer().not_null().auto_increment().primary_key())
                .col(ColumnDef::new(Comment::Content).string().not_null())
                .col(ColumnDef::new(Comment::CreateTime).timestamp().default(Expr::current_timestamp()))
                .col(ColumnDef::new(Comment::UserId).integer().not_null())
                .col(ColumnDef::new(Comment::ActionId).integer().not_null())
                .foreign_key(
                    ForeignKey::create()
                        .from_tbl(Comment::Table)
                        .from_col(Comment::UserId)
                        .to(User::Table, User::Id)
                        .on_update(ForeignKeyAction::Cascade)
                        .on_delete(ForeignKeyAction::Cascade),
                )
                .foreign_key(
                    ForeignKey::create()
                        .from_tbl(Comment::Table)
                        .from_col(Comment::ActionId)
                        .to(Actions::Table, Actions::Id)
                        .on_update(ForeignKeyAction::Cascade)
                        .on_delete(ForeignKeyAction::Cascade),
                )
                .to_owned(),
        )
        .await?;

        // 创建Favorite表,包含联合主键和外键约束
        manager.create_table(
            Table::create()
                .table(Favorite::Table)
                .if_not_exists()
                .col(ColumnDef::new(Favorite::UserId).integer().not_null())
                .col(ColumnDef::new(Favorite::ActionId).integer().not_null())
                .col(ColumnDef::new(Favorite::CreateTime).timestamp().default(Expr::current_timestamp()))
                // 设置联合主键
                .primary_key(Index::create().col(Favorite::UserId).col(Favorite::ActionId))
                .foreign_key(
                    ForeignKey::create()
                        .from_tbl(Favorite::Table)
                        .from_col(Favorite::UserId)
                        .to(User::Table, User::Id)
                        .on_update(ForeignKeyAction::Cascade)
                        .on_delete(ForeignKeyAction::Cascade),
                )
                .foreign_key(
                    ForeignKey::create()
                        .from_tbl(Favorite::Table)
                        .from_col(Favorite::ActionId)
                        .to(Actions::Table, Actions::Id)
                        .on_update(ForeignKeyAction::Cascade)
                        .on_delete(ForeignKeyAction::Cascade),
                )
                .to_owned(),
        )
        .await
    }

    // `down`方法用于回滚数据库表结构,即删除之前在`up`方法中创建的表
    async fn down(&self, manager: &SchemaManager) -> Result<(), DbErr> {
        // 按照逆序删除表
        manager.drop_table(Table::drop().table(Favorite::Table).to_owned()).await?;
        manager.drop_table(Table::drop().table(Comment::Table).to_owned()).await?;
        manager.drop_table(Table::drop().table(Actions::Table).to_owned()).await?;
        manager.drop_table(Table::drop().table(User::Table).to_owned()).await
    }
}

// 通过DeriveIden特性自动生成对应的枚举标识符,分别对应四个实体表(User、Actions、Comment、Favorite)
#[derive(DeriveIden)]
pub enum User {
    Table,
    Id,
    Username,
    Email,
    Address,
    Age,
}

#[derive(DeriveIden)]
pub enum Actions {
    Table,
    Id,
    AuthorId,
    Title,
    Description,
    CreateTime,
    UpdateTime,
    UsedTimes,
}

#[derive(DeriveIden)]
pub enum Comment {
    Table,
    Id,
    Content,
    CreateTime,
    UserId,
    ActionId,
}

#[derive(DeriveIden)]
pub enum Favorite {
    Table,
    UserId,
    ActionId,
    CreateTime,
}
这段代码定义了一个数据库迁移模块,使用SeaORM框架处理SQL数据库表的创建和删除。Migration 结构体实现了 MigrationTrait,其中 up 方法用于执行数据库表结构升级操作,包括创建四个相关的数据表:User、Actions、Comment 和 Favorite,并设置相应的字段属性和外键约束。down 方法则是用来撤销这些更改,按照相反的顺序删除这四个表。同时,还定义了一系列枚举以表示各表及其字段名。
# 3.使用shuttle数据库
Shuttle Shared Databases (opens new window)
步骤一:安装Shuttle共享数据库依赖
为了在项目中使用Shuttle提供的共享数据库服务,首先需要安装相应的Rust库。在项目的Cargo.toml文件所在目录下执行以下命令:
cargo add shuttle-shared-db sea-orm sqlx \
    -F shuttle-shared-db/postgres \
    -F shuttle-shared-db/sqlx \
    -F sea-orm/sqlx-postgres \
    -F sea-orm/runtime-tokio-native-tls
这将添加shuttle-shared-db、sea-orm和sqlx等依赖,并指定相关特性。
步骤二:配置主程序入口(src/main.rs)
接下来,在 src/main.rs 文件中引入必要的模块并修改主函数以利用Shuttle的数据库连接池:
// 引入必要的模块
use migration::MigratorTrait;
use sea_orm::SqlxPostgresConnector;
use shuttle_runtime::{main, ShuttleAxum};
use shuttle_shared_db::Postgres;

#[main]
async fn main(
  // 添加Shuttle Shared Database的Postgres连接池参数
  #[shared_db(Postgres)] pool: sqlx::PgPool,
) -> ShuttleAxum {
  	// 将SQLx的PgPool转换为SeaORM所需的连接器
    let connector = SqlxPostgresConnector::from_sqlx_postgres_pool(pool);

  	// 执行数据库迁移操作
    migration::Migrator::up(&connector, None).await.unwrap();

    // ... 其他代码,如定义GraphQL Schema和路由等
    let schema = Schema::build(Query, EmptyMutation, EmptySubscription)
        .finish();
    let router = Router::new()
        .route("/", get(hello_world))
        .route("/graphql", get(graphql).post_service(GraphQL::new(schema)));

    Ok(router.into())
}
步骤三:运行Shuttle应用
确保已安装Docker环境,因为Shuttle框架会在本地通过启动数据库镜像来提供数据库服务。
执行以下命令启动你的应用程序:
cargo shuttle run
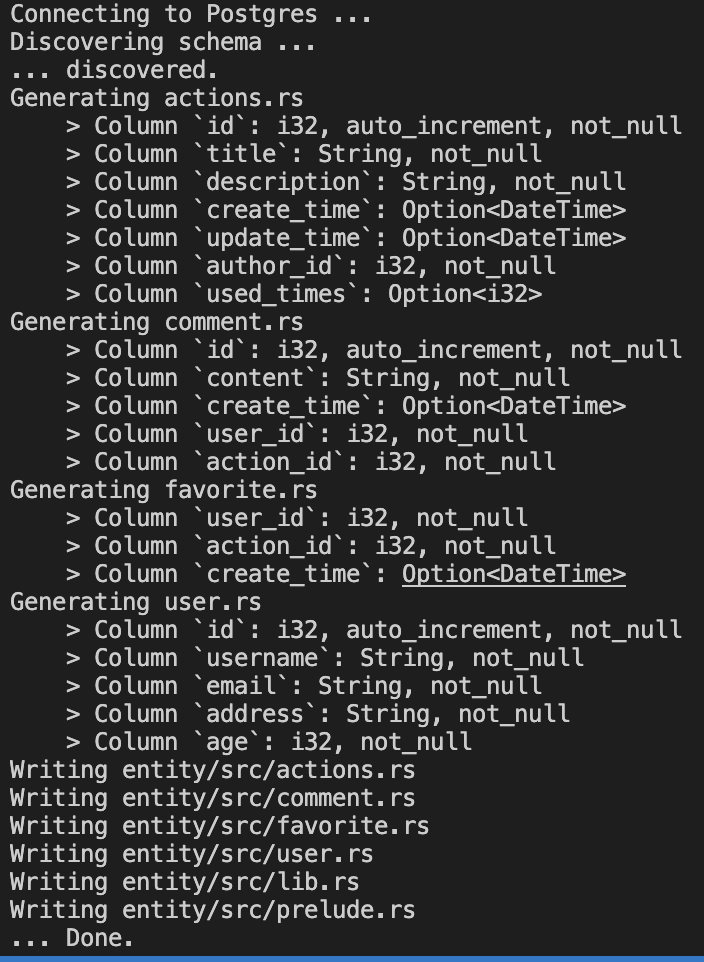
当Shuttle成功启动后,你将在控制台看到由Shuttle自动构建并分配的数据库连接地址。这个地址可以直接用于连接到Shuttle管理的共享数据库实例,无需手动配置即可直接使用。同时,请参考运行时输出的日志信息查看具体连接详情,如下图所示:

现在,你的应用已经集成Shuttle共享数据库,并进行了必要的初始化和连接设置,可以继续进行数据操作与业务逻辑开发了。
# 4.定义实体
步骤一:数据库迁移
在进行实体定义之前,首先确保已对数据库进行手动迁移。使用如下命令进行升级:
cargo run -p migration -- -u "postgres://postgres:postgres@localhost:22732/postgres"
如果需要回退到前一个迁移版本,执行以下降级命令:
cargo run -p migration -- -u "postgres://postgres:postgres@localhost:22732/postgres" down
步骤二:生成实体
当数据库迁移成功后,利用sea-orm提供的命令行工具(sea-orm-cli)生成实体文件:
sea-orm-cli generate entity \
    -o entity/src \
    -l \
    -u postgres://postgres:postgres@localhost:22732/postgres \
    --with-serde both \
    --model-extra-attributes='graphql(concrete(name = "Favorite", params()))' \
    --model-extra-derives async_graphql::SimpleObject

这将依据数据库表结构自动生成实体模型代码。
步骤三:查看生成的目录结构与实体代码
生成的 entity 目录及其内容如下:
.
├── Cargo.toml
└── src
    ├── actions.rs
    ├── comment.rs
    ├── favorite.rs
    ├── lib.rs
    ├── prelude.rs
    └── user.rs
以 favorite.rs 文件为例,它包含由 sea-orm-codegen 自动生成的实体代码:
//! `SeaORM` Entity. Generated by sea-orm-codegen 0.12.14

// ... (省略导入部分)

#[derive(...)]
#[sea_orm(table_name = "favorite")]
#[graphql(concrete(name = "Favorite"params()))] // 这里有一个小错误
pub struct Model {
    #[sea_orm(primary_key, auto_increment = false)]
    pub user_id: i32,
    #[sea_orm(primary_key, auto_increment = false)]
    pub action_id: i32,
    pub create_time: Option<DateTime>,
}

// ... (省略关系和ActiveModelBehavior实现部分)
步骤四:修正生成的实体代码
由于生成的 favorite.rs 中的 GraphQL 注解有误,需要手工修改:
#[graphql(concrete(name = "Favorite", params()))]
// 注意这里添加了逗号,并且确保名称与表名对应正确
步骤五:初始化并配置实体模块
进入 entity 目录,初始化一个新的 Rust 项目并安装所需依赖:
cd entity
cargo init
cargo add async-graphql sea-orm serde -F serde/derive async-graphql/chrono
步骤六:将实体模块添加到工作区
回到根目录下的 Cargo.toml 文件中,将其配置为工作区成员,并添加相关依赖项:
[dependencies]
# 其他已有依赖...
migration = { path = "./migration" }
entity = { path = "./entity" }

[workspace]
members = ["entity", "migration"]
现在您已完成实体的定义和集成。后续可以根据实际需求进一步完善或扩展这些实体以及相关服务代码。
# 5. 编写服务
本节将指导您如何在 Rust 应用程序中创建一个新的库包,专门用于处理与数据库交互的逻辑。我们将通过 sea-orm 框架实现用户服务的相关操作,并为后续编写测试做好准备。
步骤一:新建服务库
首先,在项目根目录下创建一个新的 Rust 库:
cargo new --lib service
接下来,安装所需的依赖项:
# 安装entity模块依赖
cargo add entity --path ../entity
# 安装sea-orm库及其特定功能
cargo add sea-orm -F debug-print,runtime-tokio-native-tls,sqlx-postgres
# 安装开发依赖tokio
cargo add tokio --dev -F full
步骤二:配置Cargo.toml文件
打开 service/Cargo.toml 文件,添加 mock 功能,并配置相关依赖:
[package]
name = "service"
version = "0.1.0"
edition = "2021"

[dependencies]
entity = { version = "0.1.0", path = "../entity" }
sea-orm = { version = "0.12.14", features = [
    "debug-print",
    "runtime-tokio-native-tls",
    "sqlx-postgres",
] }

[dev-dependencies]
tokio = { version = "1.36.0", features = ["full"] }

# 添加 mock 功能
[features]
mock = ["sea-orm/mock"]

[[test]]
name = "mock"
required-features = ["mock"]
步骤三:创建并配置测试文件
在 tests/ 目录下创建一个名为 mock.rs 的文件,稍后我们会在这里编写针对服务的模拟测试。
当前项目的目录结构应如下所示:
.
├── Cargo.toml
├── src
│   ├── actions.rs
│   ├── comment.rs
│   ├── favorite.rs
│   ├── lib.rs
│   ├── prelude.rs
│   └── user.rs
└── tests
    └── mock.rs
步骤四:实现User服务
在 src/user.rs 文件中,我们定义了 UserServer 结构体,并实现了获取所有用户、根据ID获取用户、创建用户、更新用户和删除用户等方法:
use ::entity::{
    prelude::User,
    user::{ActiveModel, Model},
};
use sea_orm::*;

pub struct UserServer;

impl UserServer {
    /// 获取所有用户
    pub async fn get_all_user(db: &DbConn) -> super::Result<Vec<Model>> {
        User::find().all(db).await
    }

    /// 根据ID获取用户
    pub async fn get_user_by_id(db: &DbConn, id: i32) -> super::Result<Option<Model>> {
        User::find_by_id(id).one(db).await
    }

    /// 创建用户
    pub async fn create_user(db: &DbConn, from_data: Model) -> super::Result<Model> {
        let active_model = ActiveModel {
            username: Set(from_data.username.to_owned()),
            email: Set(from_data.email.to_owned()),
            address: Set(from_data.address.to_owned()),
            age: Set(from_data.age),
            ..Default::default()
        };
        let res = User::insert(active_model).exec(db).await?;

        Ok(Model {
            id: res.last_insert_id,
            ..from_data
        })
    }

    /// 更新用户
    pub async fn update_user(db: &DbConn, id: i32, from_data: Model) -> super::Result<Model> {
        let user: ActiveModel = User::find_by_id(id)
            .one(db)
            .await?
            .ok_or(DbErr::Custom("Cannot find user".to_owned()))?
            .into();
        ActiveModel {
            id: user.id,
            email: Set(from_data.email.to_owned()),
            address: Set(from_data.address.to_owned()),
            age: Set(from_data.age),
            ..user
        }
        .update(db)
        .await
    }

    /// 删除用户
    pub async fn delete_user(db: &DbConn, id: i32) -> super::Result<DeleteResult> {
        let user: ActiveModel = User::find_by_id(id)
            .one(db)
            .await?
            .ok_or(DbErr::Custom("Cannot find user".to_owned()))?
            .into();

        user.delete(db).await
    }
}
其他服务类可以按照类似的方式推导并实现。
总结:
至此,我们已经成功地创建了一个新的库包 service,并实现了用户服务的相关操作。下一节我们将编写相应的单元测试,利用 sea-orm 提供的 mock 功能对这些服务进行验证。
# 6.编写服务测试
目录结构如下
.
├── Cargo.toml
├── src
│   ├── actions.rs
│   ├── comment.rs
│   ├── favorite.rs
│   ├── lib.rs
│   ├── prelude.rs
│   └── user.rs
└── tests
    ├── mock.rs
    └── prepare.rs

3 directories, 9 files
步骤一:在 prepare.rs 中设置模拟数据
首先,在 tests/prepare.rs 文件中创建一个函数用于初始化并配置模拟数据库连接。这个函数会返回一个模拟的 DatabaseConnection 对象,并预设查询结果。
use ::entity::user;
use sea_orm::*;

#[cfg(feature = "mock")]
pub fn prepare_mock_db() -> DatabaseConnection {
    // 创建一个新的Mock数据库连接
    MockDatabase::new(DatabaseBackend::Postgres)
        // 添加查询结果
        .append_query_results(vec![
            // 用户1
            [user::Model {
                id: 1,
                username: "张三".to_string(),
                email: "zhangsan@example.com".to_string(),
                address: "河南省郑州市".to_string(),
                age: 25,
            }],
            // 用户2
            [user::Model {
                id: 2,
                username: "李四".to_string(),
                email: "lisi@example.com".to_string(),
                address: "广东省广州市".to_string(),
                age: 30,
            }],
            // 用户3
            [user::Model {
                id: 3,
                username: "王五".to_string(),
                email: "wangwu@example.com".to_string(),
                address: "上海市".to_string(),
                age: 22,
            }],
            [user::Model {
                id: 4,
                username: "张三".to_string(),
                email: "zhangsan@example.com".to_string(),
                address: "河南省郑州市".to_string(),
                age: 25,
            }],
            [user::Model {
                id: 4,
                username: "李四".to_string(),
                email: "lisi@qq.com".to_string(),
                address: "地球村".to_string(),
                age: 0,
            }],
            [user::Model {
                id: 6,
                username: "张三6".to_string(),
                email: "zhangsan6@example.com".to_string(),
                address: "河南省郑州市".to_string(),
                age: 6,
            }],
        ])
        // 添加执行结果
        .append_exec_results([MockExecResult {
            last_insert_id: 4,
            rows_affected: 1,
        }])
        // 将Mock数据库连接转换为DatabaseConnection类型
        .into_connection()
}
步骤二:在 mock.rs 中编写服务测试
接下来,在 tests/mock.rs 文件中编写实际的服务测试。使用 prepare_mock_db 函数来获取模拟数据库连接,并针对用户服务进行各种操作的测试。
use entity::user::Model;
use service::user::UserServer;
mod prepare;

#[tokio::test]
async fn test_get_user_by_id() {
    // 准备模拟数据库连接
    let db = &prepare::prepare_mock_db();

    // 测试获取用户信息
    {
        let user = UserServer::get_user_by_id(db, 1).await.unwrap().unwrap();
        assert_eq!(user.id, 1);
        assert_eq!(user.username, "张三");
        // 其他属性断言...
    }

    {
        let user = UserServer::get_user_by_id(db, 2).await.unwrap().unwrap();
        assert_eq!(user.age, 30);
    }

    {
        let res = UserServer::create_user(
            db,
            Model {
                id: 0,
                username: "yexiyue".to_string(),
                email: "yexiyue666@qq.com".to_string(),
                address: "地球村".to_string(),
                age: 0,
            },
        )
        .await
        .unwrap();
        eprintln!("{:?}", res);
        assert_eq!(res.id, 3);
    }
    {
        let res = UserServer::update_user(
            db,
            4,
            Model {
                id: 4,
                username: "李四".to_string(),
                email: "lisi@qq.com".to_string(),
                address: "地球村".to_string(),
                age: 0,
            },
        )
        .await
        .unwrap();
        eprintln!("{:?}", res);
    }

    {
        let res = UserServer::delete_user(db, 6).await.unwrap();
        eprintln!("{:?}", res);
    }
}
执行测试命令
cargo test -p service -F mock --test mock -- --nocapture
注意:
每次对数据库的读取操作都需要预先在 prepare_mock_db 中对应地添加一个 query_result。
删除或其他修改操作需要添加相应的 exec_results。
在每次操作后,Mock 数据库都会自动移除匹配到的缓冲数据,
因此在准备模拟结果时,务必考虑实际代码中进行了多少次读取或删除操作。
# 7. 编写API接口教程
本节将指导您如何在 Rust 应用程序中创建 GraphQL API 接口。我们将基于 async-graphql 和 sea-orm 框架,实现用户查询与操作相关的 API。
步骤一:创建 Rust 库
首先,在项目根目录下新建一个 Rust 库用于编写 API:
cargo new --lib api
步骤二:创建文件结构
在 api/src 目录下创建 query 和 mutation 子目录,并分别在其中建立对应的模块和文件,最终的目录结构如下:
.
├── Cargo.toml
└── src
    ├── lib.rs
    ├── mutation
    │   ├── mod.rs
    │   └── user.rs
    └── query
        ├── mod.rs
        └── user.rs
步骤三:配置Cargo.toml文件
编辑 api/Cargo.toml 文件,添加依赖项:
[package]
name = "api"
version = "0.1.0"
edition = "2021"

[dependencies]
service = { path = "../service" } // 引入服务层库
entity = { path = "../entity" } // 引入实体层库
async-graphql = { version = "7.0.2", features = ["chrono"] }
sea-orm = { version = "0.12.14", features = [
    "sqlx-postgres",
    "runtime-tokio-native-tls",
] }
步骤四:编写查询相关API
在 query/user.rs 文件中,定义 UserQuery 结构体并实现其为 GraphQL 查询对象:
// query/user.rs
use async_graphql::*;
use service::user::UserServer;

#[derive(Default)]
pub struct UserQuery;

#[Object]
impl UserQuery {
    pub async fn get_users(&self, ctx: &Context<'_>) -> Result<Vec<entity::user::Model>> {
        let db = ctx.data::<DbConn>()?;
        let users = UserServer::get_all_user(db).await?;
        Ok(users)
    }

    pub async fn get_user_by_id(
        &self,
        ctx: &Context<'_>,
        id: i32,
    ) -> Result<Option<entity::user::Model>> {
        let db = ctx.data::<DbConn>()?;
        let user = UserServer::get_user_by_id(db, id).await?;
        Ok(user)
    }
}
在 query/mod.rs 中引入并合并查询对象:
// query/mod.rs
use async_graphql::MergedObject;

use self::user::UserQuery;

mod user;

#[derive(Default, MergedObject)]
pub struct Query(UserQuery);
步骤五:编写mutation相关API
在 mutation/user.rs 文件中,定义 UserMutation 结构体并实现其为 GraphQL 变更对象,同时定义输入对象:
// mutation/user.rs
use async_graphql::*;
use entity::user;
use service::user::UserServer;

#[derive(InputObject)]
pub struct CreateUserInput {
    username: String,
    email: String,
    address: String,
    age: i32,
}

impl Into<user::Model> for CreateUserInput {
    fn into(self) -> user::Model {
        entity::user::Model {
            id: 0,
            username: self.username,
            email: self.email,
            address: self.address,
            age: self.age,
        }
    }
}

#[derive(InputObject)]
pub struct UpdateUserInput {
    id: i32,
    email: String,
    address: String,
    age: i32,
}

impl Into<user::Model> for UpdateUserInput {
    fn into(self) -> user::Model {
        entity::user::Model {
            id: self.id,
            username: "".to_string(),
            email: self.email,
            address: self.address,
            age: self.age,
        }
    }
}

#[derive(Default)]
pub struct UserMutation;

#[Object]
impl UserMutation {
    // 创建用户
    pub async fn create_user(
        &self,
        ctx: &Context<'_>,
        input: CreateUserInput,
    ) -> Result<user::Model> {
        let db = ctx.data::<DbConn>()?;
        let res = UserServer::create_user(db, input.into()).await?;
        Ok(res)
    }

    // 更新用户
    pub async fn update_user(
        &self,
        ctx: &Context<'_>,
        input: UpdateUserInput,
    ) -> Result<user::Model> {
        let db = ctx.data::<DbConn>()?;
        let res = UserServer::update_user(db, input.id, input.into()).await?;
        Ok(res)
    }

    // 删除用户
    pub async fn delete_user(&self, ctx: &Context<'_>, id: i32) -> Result<String> {
        let db = ctx.data::<DbConn>()?;
        let res = UserServer::delete_user(db, id).await?;
        if res.rows_affected > 0 {
            Ok("success".to_string())
        } else {
            Ok("error".to_string())
        }
    }
}

// mutation/mod.rs
use async_graphql::MergedObject;

use self::user::UserMutation;

mod user;

#[derive(MergedObject, Default)]
pub struct Mutation(UserMutation);
步骤六:构建GraphQL Schema
在 src/lib.rs 文件中导入查询和变更模块,并定义一个函数来构建GraphQL Schema:
// src/lib.rs
mod mutation;
mod query;
use async_graphql::*;
use mutation::Mutation;
use query::Query;
use sea_orm::DbConn;

pub fn build_schema(db: DbConn) -> Schema<Query, Mutation, EmptySubscription> {
    Schema::build(Query::default(), Mutation::default(), EmptySubscription)
        .data(db)
        .finish()
}
现在你已经成功地构建了基于 async-graphql 和 sea-orm 的用户查询和变更相关的 GraphQL API 接口。在实际应用中,你可以根据需要将这些接口整合到您的应用程序服务器中提供服务。
# 8. 使用Shuttle部署应用
步骤一:在主程序中集成API包
首先,在项目根目录下的 src/main.rs 文件中,将之前创建的 api 包作为依赖添加进来,并在主函数中使用 api 提供的方法构建GraphQL Schema。
// 引入必要的模块和包
use async_graphql::{http::GraphiQLSource, *};
use async_graphql_axum::GraphQL;
use axum::{
    response::{Html, IntoResponse},
    routing::get,
    Router,
};
use migration::MigratorTrait;
use sea_orm::SqlxPostgresConnector;
use api; // 引入api库

async fn graphql() -> impl IntoResponse {
    Html(GraphiQLSource::build().endpoint("/graphql").finish())
}

async fn hello_world() -> &'static str {
    "Hello, world!"
}

#[shuttle_runtime::main]
async fn main(#[shuttle_shared_db::Postgres] pool: sqlx::PgPool) -> shuttle_axum::ShuttleAxum {
    let coon = SqlxPostgresConnector::from_sqlx_postgres_pool(pool);
    migration::Migrator::up(&coon, None).await.unwrap();

    // 使用api库提供的方法构建schema
    let schema = api::build_schema(coon);

    let router = Router::new()
        .route("/", get(hello_world))
        .route("/graphql", get(graphql).post_service(GraphQL::new(schema)));

    Ok(router.into())
}
步骤二:本地运行与测试
在本地运行应用程序以验证接口是否正常工作:
cargo shuttle run
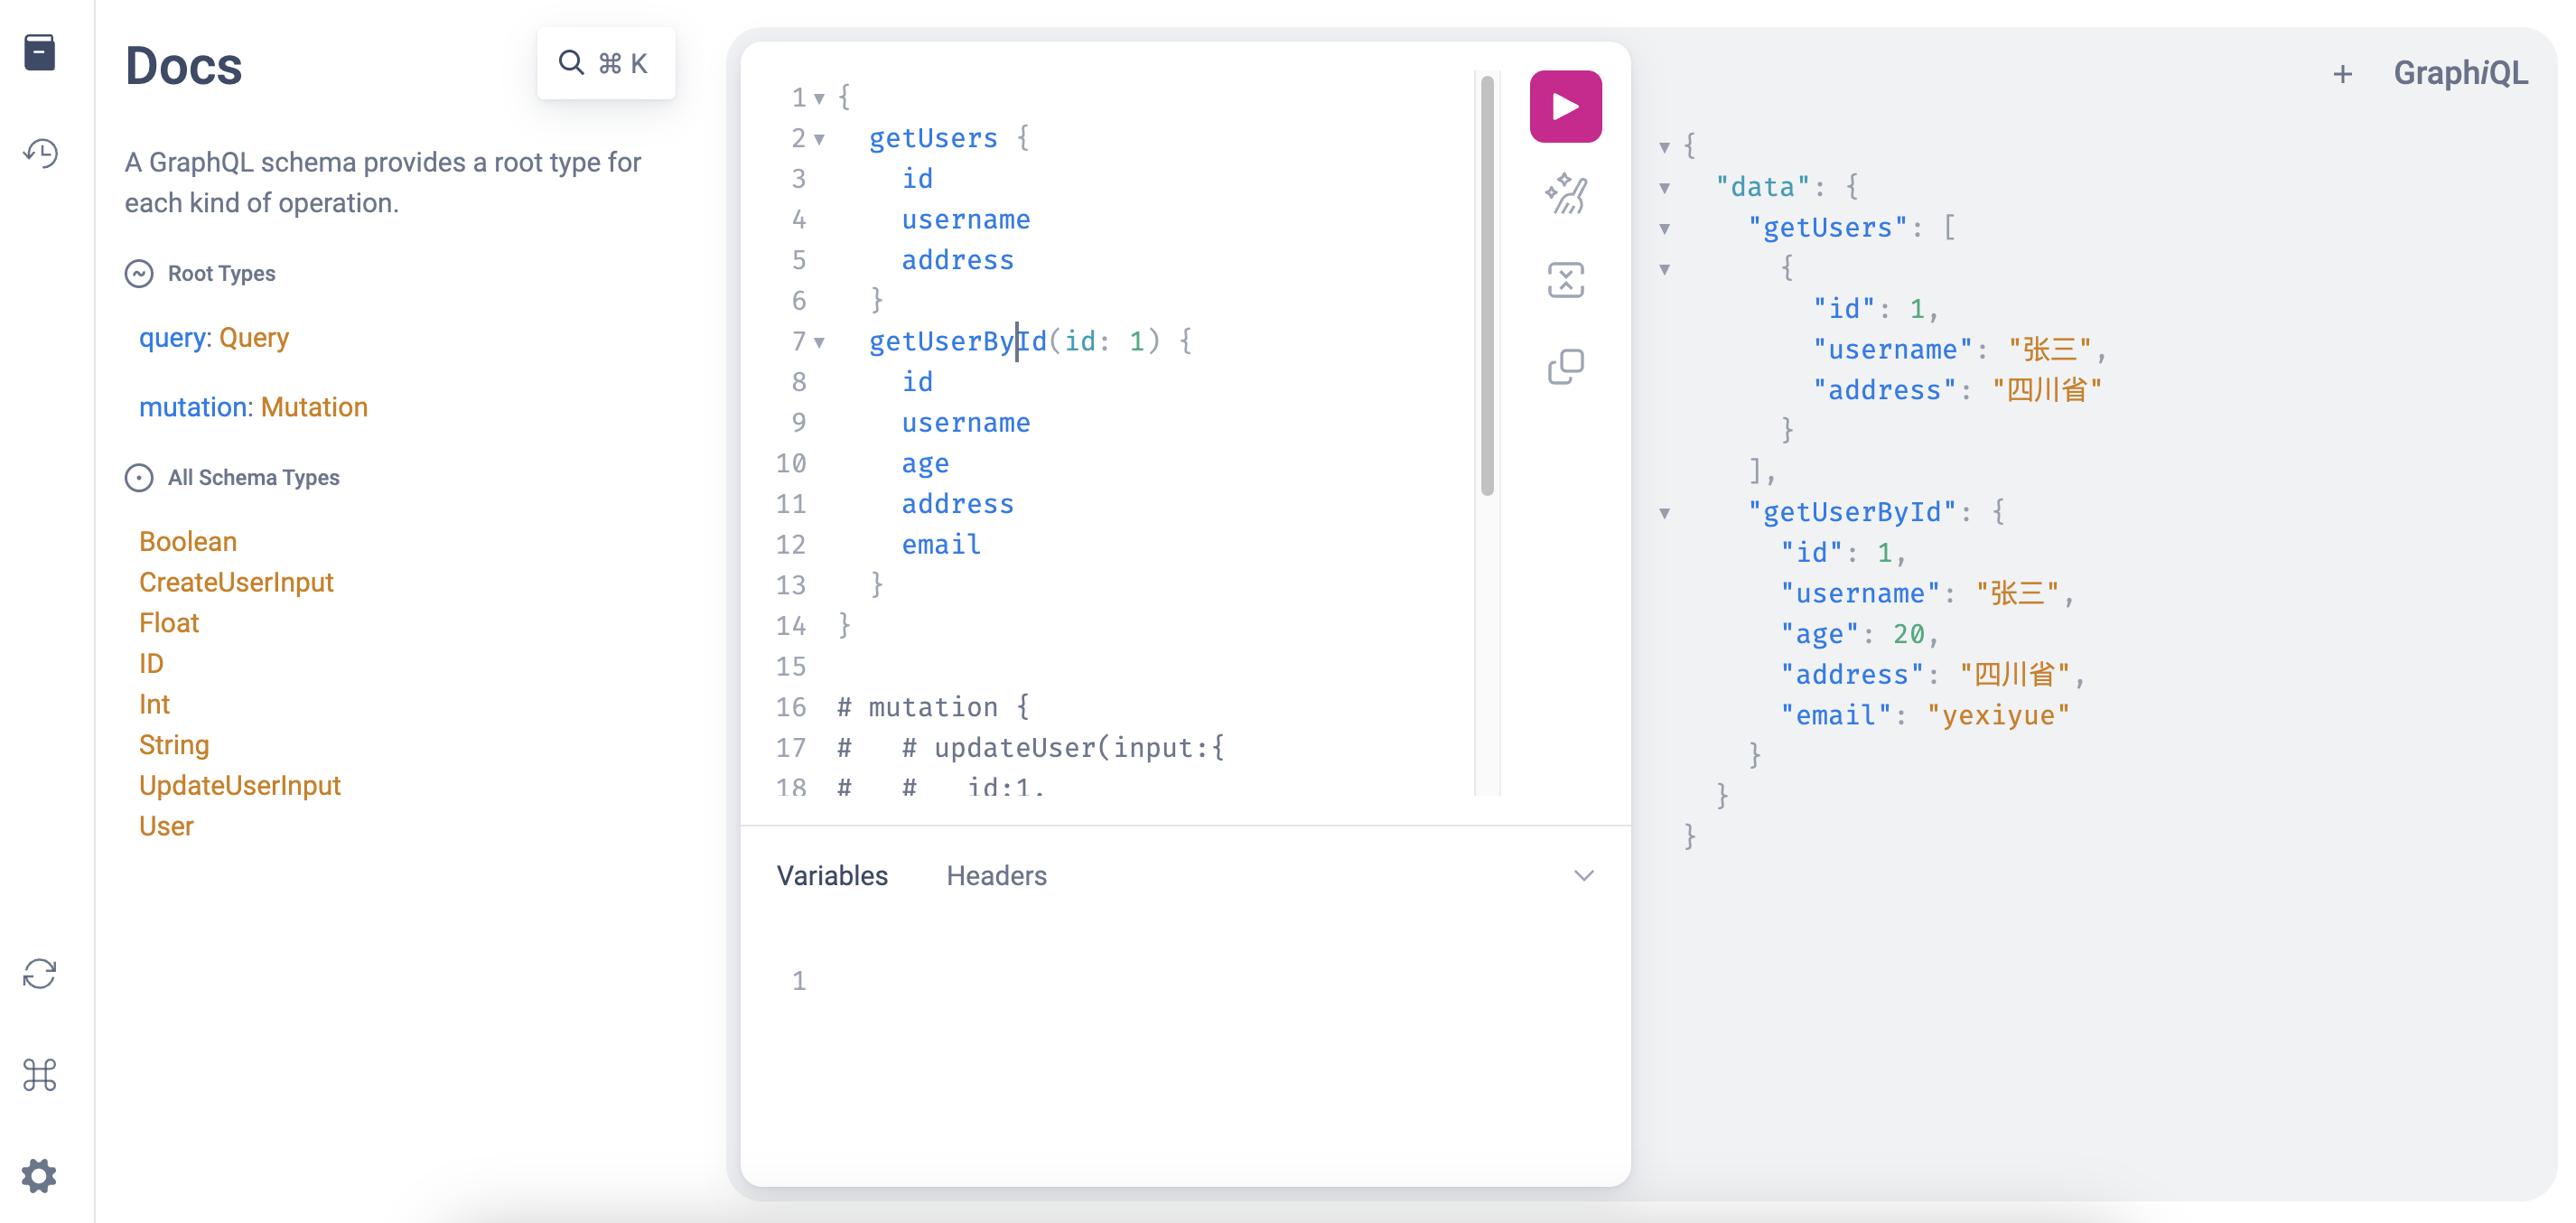
访问 http://localhost:3000/graphql (opens new window) 可查看并测试 GraphQL API 接口,并通过 http://localhost:3000/ (opens new window) 查看欢迎页面。成功后应能看到如下所示的 GraphiQL 页面:

步骤三:部署到Shuttle
Idle Projects - Shuttle (opens new window)
启动新项目
在Shuttle环境中启动一个永不休眠的新项目(将
--idle-minutes设置为0):cargo shuttle start --idle-minutes 0部署应用
使用
cargo shuttle deploy命令将应用部署至 Shuttle 平台:cargo shuttle deploy成功部署后,您将在控制台看到类似于以下的成功信息:

现在您的应用已经成功部署到了Shuttle平台,并且可以根据需要进行访问和管理。请注意,实际部署过程中需根据Shuttle环境的具体情况进行相应配置。
